Wednesday 30 March 2011

Animation of Scene Two

I have completed the animation side of my second scene. As my animation is from first person perspective, I had to pay special attention to the position of the camera as it has to appear as what Bond would see. This proved tricky at first but I got the hang of it.


Firstly I needed to create my office scene. It is quite bare at the moment but I will add to it later on. At the moment there are two walls and roof. There is a door in the middle with a padlock on it (made out of a box and two cylinders). I have imported the watch and hand models into the scene. To create the arm, I used a cylinder and used the inset tool to create a smaller circle inside the end polygon. Then I extruded out the end of the arm which would be the sleeve.


I then used the material editor and set the IDs of the poly. I selected the new extruded end and set it as ID2 and the rest of the arm as ID1. Using material editor I selected a new multi/sub object material and put ID1 as black and ID2 as white. This then changed the colour of the arm. After resizing it and placing the watch onto the end, I could move onto editing the hand.


Now I had a problem, I had created a right hand and I needed a left one. The solution was to select all the vertices of the hand and use the mirror modifier to replicate the model mirrored. I then resized the hand a put it into place.


I could now start animating. I needed to position the camera so the hand appeared so Bond checked the time. I used set frames to do this and coordinated the two movements. I then carried on with the camera and moved it towards the door.


I had to get the arm to follow it as it is needed again. The arm comes back into shot and the laser beam appears. This is just a cylinder at the moment. I have changed when it appears using the mini curve editor in the bottom left corner. Adding a visibility track and keyframes enables me to select the exact point I want the laser to be on screen.


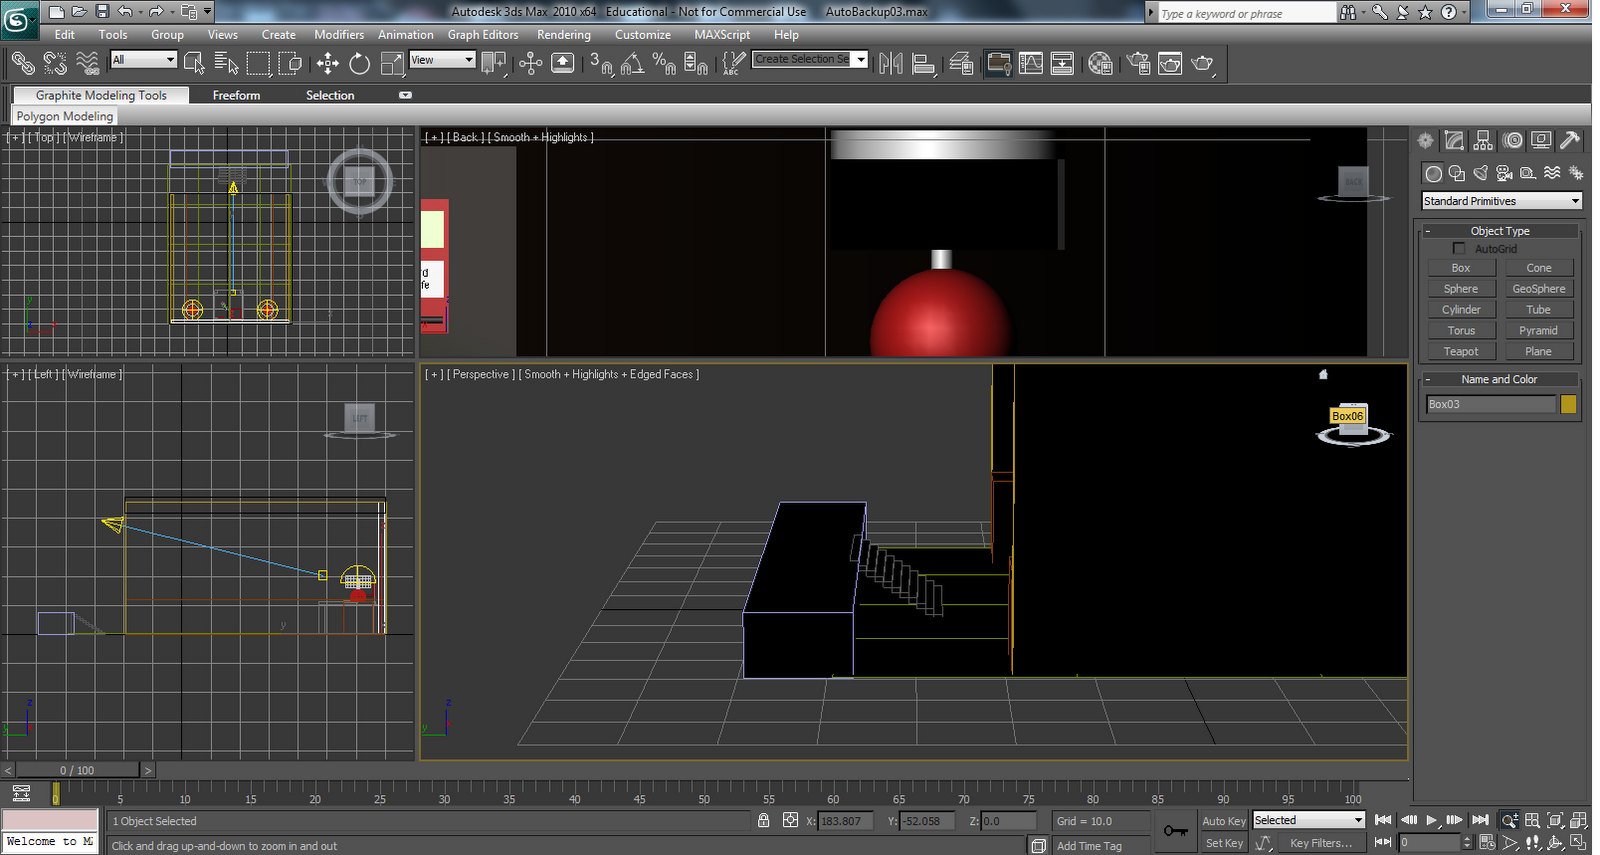
Here is the first render of the video.


After seeing this video, I noticed that there is a point where you see the gap at the end of the arm. I fixed this by moving the arm slightly to the left. Next, it was time to alter the design of the environment itself. I need a sign saying 006 for the door, as well as other items that might be found in MI6. I need to add some lights too, to give the corridor a more realistic feel.


I have changed the material of the laser to have self illumination with glow (lume). The laser has also been shrunk slightly so it is thinner. By moving the position of the arm, this also meant I had to move the laser position. I did this by rotating it back into place. The scene seems to happen very quickly, which makes me feel I need to find a few more seconds from somewhere. I will need to go over the thirty second mark, there is no way I can fit the required animation into the time plan I created.


I have now finished the scene completely. After some debate about colours and materials I settled on white walls with a blue door. The doors have a wallpaint material with high gloss whereas the walls have a bump map with noise, to make them appear more paint like. I also improved the animation of the scene by getting the door to open once the padlock drops off. This was done by using set key, and the rotate tool. On the door, I created a JPEG in photoshop saying "006 office", so I imported that onto a plane and put it on the door. I also created another door and put it on the right hand wall, to make it seem more office like.


I created a picture of Judy Dench as M and put her on the wall in a photo frame. To create the photo frame, I created a box and inset a a square into one of the sides. then I deleted the two faces so there was a gap in the middle and placed the JPEG inside. The picture frame has a high gloss, pro stone material. This reflects the scene in it.


I changed the way the padlock drops, using reactor. I used autokey to get the left hand part of the padlock to drop, as this was the point where the padlock was burnt. As for the rest of the padlock I selected it and brough up the reactor menus. I selected the right hand part of the lock and the lock body and made them a rigid body collection.


I then right clicked on the lock body and gave it a mass of ten (select object, open property editor on reactor menu). Ater doing the same for the rest of the lock it was then time to designate when the lock will fall.


After putting in the start and end time on the right panel, it was time to set the gravity. I also set the gravity, (Havok 1 world) which sets the rate at which the padlock falls.


After some experimentation, I managed to get a good realistic drop of a padlock! After previewing the animation and creating it, the frames were inserted into my scene.


To create the smoke for the laser, I used the spray particle system. This is found in particle systems on the create panel. There are a lot of settings that can be changed within the systems. I shrunk the particle size and range. I then added a smoke material on in the material editor. Using a standard material, setting the diffuse colour to smoke. After setting which frames I wish the smoke to be visible for, I was ready to render the final scene.


Since this video, I have adjusted the superspray on the smoke for the laser. I made the particle sizes bigger, and the spray span a wider space. The result is now far more effective as before the smoke was a bit limited shooting straight upwards.


Got3d
Got3d Texture Store - 70 Carpet Textures
2004
http://store.got3d.com/products/70-carpet-textures/pages/Office-Carpet06.html
[Internet]
[31/3/2011]


Ian Jackson
A-Listers donate clothes to Alder Hey Imagine Appeal
2010
http://www.artinliverpool.com/blog/2010/08/a-listers-donate-clothes-to-alder-hey-imagine-appeal/
[Internet]
[31/3/2010]

Using Bones and Biped

In the last lecture, we learnt how to use the bones system as well as bipeds. These are very useful for animating a person and other types of characters.

Firstly we applied bones to a simple shape. In this case using a cylinder. Once the cylinder was made, go to systems and bones. Dragging a few bones down (in this case four) they are then placed inside the cylinder. After this, select the cylinder and use the skin modifier. Adding the bones will mean the two objects become linked together. Now, when you move the bones, the shape of the object will change.


Next, we looked at using a biped. This is a skeleton figure that can be applied to a model to animate it like a human being. We downloaded a human shaped model and selected biped from the systems panel. The first thing to do is to shape the biped to be the same size as the model. This means aligning the arms and the legs into place along with the head and torso. To do this, you have to select motion and figure mode. This will then enable the editing of the bones within the biped.


Once the biped is correctly aligned, place it inside the model. Then select the model and find the physique modifier. This then enables you to link the biped to the model. Once linked, open the envelope tool on the modifier panel. You can then select every individual bone and edit the envelope size, which in turn will change how the model moves when the shape is changed. When this is complete, the model can start to be animated.


Monday 28 March 2011

Updated Storyboard

I have finally had a chance to scan in my updated storyboard. This is where I am drawing my ideas for my animating now. I have already nearly completed the first and last scene. Now just for the middle ones!


Along with this storyboard and the time plan I made last week, I am now fully able to plan how to complete the assignment.

Sunday 27 March 2011

Opening Sequence

I have created the opening sequence for my animation. The scene will be five seconds long and will contain a slow zoom in the the MI6 building. I created a plane and imported the bitmap onto it. I wanted to use my own water material instead of the water in the picture. 3ds max has a built in water material when you switch the renderer to mental ray. I created a box and started experimenting with the materials. There are a number of presets within the material. I struggled at first to get the river the correct colour. It needs to match the sky and the presets were either too blue or too green/brown. I opted to use a custom colour and selected one similar to that as the sky. Once rendered I decided it was good.


I added a camera to the scene and locked it to the picture. Along the timeline I auto keyed the camera to zoom in slightly over the five seconds. This means I will be able to add text using premier pro to set the scene at the start of the animation. Here is the rendered video, it took a long time to render as the water material is a promaterial. I am especially pleased with the water material as it moves when the camera zooms in.


Danny Robinson
MI6 Building, Albert Embankment
2006
http://www.geograph.org.uk/photo/177502
[Internet]
[25/3/2011]

Saturday 26 March 2011

Gun Barrel scene complete - just need a decision!

Finally, I have finished the gun barrel scene for the end of my animation. I noticed after posting last night that the blood material magnified the rest of the scene. This of course was a problem. To solve it I adjusted the material. Instead of using raytrace in the refraction map, I used the opacity map with an opacity base setting. After some experimenting around, I decided on 50%. In the scene view, the material appears to be uneven around the edges on the blood but when rendered it is completely fine.


I also cut the length of the scene down to eight seconds and changed some of the timings within the scene. When I was happy I rendered and got this result.


After rendering that video I was very pleased but then I remembered when I first made the gun barrel the two materials were the other way round. I decided to switch them back (the two IDs for the raytrace and black material) and render again as it couldn't hurt to see the outcome.


I am now presented with a tough decision! The first video is more realistic to Bond as it contains the black gun barrel, however the second video looks more visually impressive. I especially like the part where the bullet fires, you see the reflection in the raytrace of the barrel. I will ask around and see which people think I should use!

Friday 25 March 2011

Gun Barrel nearly complete

I have nearly completed my gun barrel scene now for my animation. I have adjusted the bullet so it is larger so it covers the whole camera as it fires past.

I solved the problem of the bullet being in shot too long by using the mini curve editor in the bottom left hand corner of the timeline. I selected the bullet and then added a visibility track. I was then presented with a graph that represents the timeline of the animation. After inserting a keyframe, I was able to select whether the bullet could be seen at certain points. So in this case, the bullet appears when the graph starts to change its position. Using this technique, I also added a plain white plane over the front of the gun barrel. This means you cannot see the silhouette of Bond until the camera zooms in close. Again, to do this I selected the plane, and added a visibility track, moving the graph to show where the object becomes visible.


The other problem I mentioned in the previous post was the blood. I came to the conclusion the best technique was to use a simple plane and edit the vertices. After some experimentation I finally achieved a realistic effect. I placed a meshsmooth modifier on the plane which makes the points of the plane less rigid. The material for the blood was blinn with a red specular colour. I added raytrace to the refraction map which adds a nice effect when rendered. The final thing to edit with this material was how see through it was. To do this I changed the specular level, settling on 100. When rendered, the gun barrel is still visible through the blood, perfect!


After that it was time to coordinate all of different features of the scene together. The camera was complete of course from previous renders. The bullet was adapted, but now with its new visibility track it made the firing more easy. I dragged the keyframes to change when the bullet is fired. It was a little bit tricky timing the blood drop but I got there eventually. I may fiddle with the timing of the scene again before I decide it is final; as this scene lasts ten seconds, where as it is meant to be only eight according to my timing plan! After a long time rendering, I got my near final gun barrel sequence!


Thursday 24 March 2011

Gun Barrel with bullet

My next draft of the gun barrel scene includes Bond firing a bullet back at the camera. I firstly imported a bullet in from my gun model made a few weeks back. I had to angle the bullet in such a way that it shot back at the camera. This was fiddly and I had to use the local view to fire the bullet at an angle. The bullet material was an ongoing problem too as I wanted the bullet to be gold as there is lots of silver in the scene. Firstly, I tried using the pro metal material, but could not get a gold effect so i I resorted to using a standard metal effect (change the blinn drop down to metal). I could then customize the colour, I also added a falloff effect to the reflection map. This gives a nice light reflection when the bullet is fired. I experimented with the specular level and glossiness until I was happy with the results.


After I got the bullet on the correct line, the animation process was fairly simple. I used set key to fire the bullet when the camera was in the correct position. The only problem is that the bullet is visible in shot before it is fired by Bond, you see it move as the camera zooms down the barrel. I will address this problem tomorrow, as well as starting work on the blood that will drip down the camera! That's that for tonight, time for some rest!

Animation Time Plan

I have planned out how long I expect the scenes in my animation to take. This should be pretty accurate to the final animation, so it will be a useful guide when I am animating.


The animation will have four different scenes. I have a new revised storyboard that will be posted as soon as I gain access to a scanner! This means the animation will be broken down into four different scenes (the last of which is very much in progress). I have allowed a second for each transition between the scenes. This will be put it at the end using premier pro. I will edit each scene individually in 3DS and then put them together at the end. This means rendering times will be smaller as the scenes will be broken down into manageable chunks. Doing it this way also enables me to set more realistic targets, such as have a certain scene drafted by a certain date etc.

SWOT Analysis

SWOT Analysis

I have carried out a SWOT analysis test to see if I am on course to meet my objectives for this module. The outcome of my work is as follows:

To create a thirty second James Bond trailer using 3DS Max, demonstrating a range of skills within the software.

Strengths – The work does demonstrate an understanding of the software. The models were made and handed in on time, fully complete. The modelling matches the storyboard set out earlier on in the course. Also, learning has been gained from completing the tutorials in class time and experimenting with some of the different features in the software. The later made models (watch, hand, gun barrel) are more in depth which helps to show that I have learnt more throughout the course. My work does show that I have learnt quite a lot since starting the course, as I had never used a piece of software like this before. I am on course to complete the animation by week 12, animating is now in full swing!


Weaknesses - The first model was very basic. This does not help me gain particularly high marks or show much skill in modelling. At times I have struggled to follow tutorials and have spent far longer doing things that would take somebody better barely any time at all. Also, I seem to struggle to solve problems, such as when I accidently hit control X (which brings up expert mode) I was clueless how to bring back the normal scene. I also find that the mesh within my models becomes messed up, no matter how careful I am. Another weakness is down to my drawing/creating ability. I have never been particularly good at creating realistic things, as can be seen from the terrible drawing on my first storyboard. I just hope that my modelling is good enough to create something realistic in the end. Animating seems ok so far, hopefully I won't come across too many problems or I may be there all day solving them!


Opportunities - This whole module is a great opportunity to get better at modelling and animating. Baring in mind I had never done anything like this before, and I am thoroughly enjoying it. I have a great opportunity this summer to spend more time in 3ds Max, improving my skills. Hopefully my final piece will give me an opportunity to enable me to get better. I also have the opportunity to learn from my mistakes this time around. If I could re-do this course now I would spend far more time planning and preparing in the first couple of weeks (tough this time as I had no real concept of what we can do in the software) and I would also choose my models far more carefully for the first hand in. I would also spend more time early on working out how I would do things later on and doing necessary tutorials.


Threats - The main threat to my work is coming across little problems that affect the scene. An example could be what happened with my gun model on one save, where suddenly I realised it was incorrectly shaped! Obviously a slip of a button previously messed it up without me noticing, and it takes ages to correct it! Another threat is the rendering times. I have already seen how long it takes to render a scene using the lab computers. I have also found out that my pc at home isn't as powerful as the lab computers, so rendering times are going to be a nightmare! As long as I plan my scenes and get animating now, there shouldn't be any major threats to me completing the objective set at the start.

Gun Barrel Sequence

Here is a fully rendered video of the gun barrel sequence. I have found a sillouette of Bond to use. I have also swapped the two colours round, so the raytrace material is now in the grooves of the barrel. I think this looks better.


Wednesday 23 March 2011

Reactor Curtain

Next, I created a curtain using reactor. Firstly using a tube as a curtain pole and some boxes as hooks. I then created a plane that will be the curtain itself.


The first thing to do now is to select the cloth modifier from the toolbar. This is the icon with a t-shirt with an M inside. Also I need to create a cloth collection (icon with a t-shirt and c) and place the curtain in it.


In the curtain properties, scroll down to the constraints part. This is where the curtain will be attached to the hooks. Select the top left vertex and "attach to rigid body". A new box called attach to rigid body appears above. Select none and then the hook above. Complete this for all three hooks so there will be three different constraints.


Now it is important the hooks and pole are set as rigid body objects. This is done using the same technique as in the previous post with the dropping spheres.


Next we will do some animating. Using autokey, move the left and centre poles across. When previewed, the curtain will move, that is if the curtain is attached correctly to the hooks.


I also added some wind onto my curtain, using the wind from reactor (not wind from particle systems) which blows when the animation is played out.


Introduction to Reactor

Reactor is a separate part of 3DS Max that allows many things to be done through its physics engine. It will be a useful tool when animating but it is worth using sparingly as it massively bumps up file sizes and rendering times.


The first thing we did using reactor was to animate some bouncing spheres. Firstly I set up a scene including two spheres and some boxes as ramps for them to slide down. Next, I set up the workplace for reactor by right clicking up the top to bring up the reactor toolbar along with going to utilities and bringing up the reactor toolbar on the right hand side.


The first thing to do was to set the materials as rigid. Go to create rigid body collection on the reactor toolbar (far left icon) and group all of the items into one collection. This means that when the objects collide they will not deform. This is done by creating a collection and then adding items to it using the panel on the right.


Next, I gave the spheres some mass. To do this, select the spheres and open property editor on the reactor toolbar. I gave each sphere a different mass which should mean they fall at a slightly different speed.


Using reactor you can create an animation or preview it. This can be seen below.


Tuesday 22 March 2011

Gun Barrel

I am now going to create the gun barrel for the iconic James Bond sequence at the start of every film. This will be seen at the end of my trailer.


The first thing to do was to create a tube in the scene. I set the radius and then put the height to -2000. This will make the tube long, which is needed. I chose to use an even number of sides, as they will form the grooves in the gun barrel. In this case, I chose 28.


(pic 1)


Next up, I selected the edges within the barrel using the top view. By selecting loop and ring from the selection panel, it selects all the edges for you. I then used chamfer, which placed extra edges in for the barrel grooves.


(pic 2)

Next I switched to polygon selection and chose each of the edges within the tube. Using the extrude tool I was able to bring the panels out slightly, increasing the size of the grooves within the tube.


(pic 3)


I noticed that the extruded parts were not in line with the rest of the tube. To solve this I switched to the scale tool and was able to drag the x and y axis until they were inline. During this model I have also learnt how to use the snaps toggle. This is very useful when trying to place something somewhere specific.


(pic 4)


Next up, I switched to the top view and selected all of the horizontal edges. Using the connect tool, I put in an extra 80 edges. As you can see from the picture, this caused 3ds max to crash! Luckily I managed to get it working without crashing.


(pic 5)


Now I will show the material that I used for the inside of the gun barrel. Using a new multi/sub object material, I set ID 1 to be standard black.


(pic 6)


ID2 was more complex, using bump as noise, and reflection as raytrace. On the model itself, ID1 was set as the entire tube using polygon selection. ID2 was set to be the inside panels of the tube (see pic 3). In the bump setting, I used 1%. This material was then applied to the tube model.


(pic 7)


Next up was animating a camera. I inserted a line through the middle of the tube, running exactly to the same length, so 2000. I placed a free camera in the centre of the tube next to this line. I then clicked on the motion panel next to create, modify etc. This brings up a new menu where I selected Assign controller. From here I chose position XYZ. This brings up a new menu with a list of options (pic 8). From the list choose path constraint. This then allows you to select the line created earlier that will be used as the camera path. It puts the keyframes in automatically, I found I had to switch the keyframes over as the camera was going the wrong way.


(pic 8)

Next I added a plane at the end of the image as well as a free light. This will reflect and refract the light when the scene is rendered. Finally, I added a twist modifier that gives the effect seen below (pic 9). The angle I used was -540. This gives a good twist on the gun barrel.


(pic 9)


Finally I added a meshsmooth modifier and rendered the image.


(pic 10)

Monday 14 March 2011

Dosed up with Olbas Oil and Cough Medicine

Have managed to create another model for my animation thisafternoon, despite feeling rather ill! I followed a tutorial online which was surprisingly good. The only tools used were Extrude and Inset. Occasionally I had to use swift loop to add more edges in where I had made an error or misjudgement.

Starting out with a simple box, I extruded the five finger parts, as well as the thumb. The thumb had to be extruded more as it is more bendy. This meant I used the rotate tool on the thumb as well to get the proper shaping.


The Length of the fingers needed to be adjusted too as obviously not all fingers on a human hand are the same length. This was fine to do for the middle two fingers, dragging the vertices, but for the index finger and pinkie, which were slightly at an angle, moving the vertices messed everything up. This was resolved by switching to 'Local' in the drop down menu next to the resize option. This then enables you to move the shape relating to wherever it is. Once the fingers were resized it was time to do the nails.


The nails were fairly easy to do as well, they required the inset tool which creates a polygon within a polygon. Once this new shape was made, I extruded it out and shrunk the end to make it curve off like a finger nail.


Next were the knuckles. This was simply a case of extruding them out slightly. For my first attempt I extruded too much, so did less when tried again.


Finally, I rotated the fingers to give them a more natural look. All that is left now is to find a good material for my hand!


When I add a smooth effect onto the hand (right click, NURMS toggle), the hand looks far more realistic. Some of the mesh has been damaged on the underside, as well as on one of the fingers, so I may need to correct this. It is however, unlikely it will be visible in my final animation.


The last thing to do with the hand is to find an appropriate material. To do this, I used a bitmap skin texture. I did try using the skin material built in with 3ds max, but couldn't get a good result. I set the nails as a different ID as finger nails are not the same colour as the rest of the hand. I set the hand polys as ID 1 and the finger nail polys as ID 2. Once this was done I imported the image into the multi/sub object material. For ID 2, I changed the Diffuse colour to make it lighter. I then had my hand complete!


Ken
Human Skin
2006
http://www.filterforge.com/filters/547.html
[Internet]
[23/3/2011]

Thursday 10 March 2011

Environment One - MI6 Office

Environments are a bit harder to make than models based on this experience! I think the reason being is that there is far more to think about and it is more fiddly as there are more things that need to be put in the right place. For my first environment I am creating the office that Bond will find his gun in on the storyboard.


First off was to create a room, so three boxes for walls, another one for the ceiling and a plane for the floor. Next up I used the stairs option in the geometry panel to put some steps in near where the door would be. The idea is that Bond will walk down the steps to the glass table at the end of the room.


I imported my mobile phone model into the scene, resized it and moved it accordingly. After dotting a few images around from the Internet onto the walls as pictures, it was time to head on into the material editor.


I am using the mental ray renderer for my scenes, this enables me to use a higher range of materials. The floor is glossy hardwood, which looks great as it reflects everything. The two side tables are wood but are unfinished hardwood meaning they don't reflect. The walls are Wall Paint brown and the table in the centre is solid glass.


The two table lamps were made separately using standard primitives. They contain spotlights inside.


Apart from there being an unusual reflection on the floor in the middle that has suddenly appeared during the render, this is the office environment.


Wednesday 9 March 2011

Animation Tutorial 1

We are beginning to learn how to animate using 3ds max. This will obviously be vital to the rest of the assignment. There are two different methods of animating, using set key and auto key. Auto key is easier, but set key is more precise.

The first thing I have decided to animate is my gun model, firing a bullet out of it. This is possible as the gun barrel has been booleaned out, so I can hide a bullet inside to be fired.

To demonstrate the different techniques, I have used Auto key for the movement of the bullet and Set key for the gun recoil.

To use auto key, select the object in the scene and press the auto key button. Then move to the frame you wish and move the item, in this case the bullet. If you scrub along the frame bar you will see the item move.


Set key is a bit more involved but far more precise. Select the item (the gun) and go to the frame you wish. In this case it is the frame where the bullet is fired (frame 3). With set key you have to press the set keys button every time you wish to insert a keyframe. This example uses the rotation tool to create the recoil.


Finally the rendering window needs to be altered to cope with animation. In Render Setup, the time output is changed from single to range and the number of frames to be rendered are inserted. The render output must be set and the file saved in an appropriate format (AVI etc)


Tuesday 8 March 2011

List of Items to make

Here is a checklist of items I need to create in 3DS max to complete this assignment. Obviously the first three are done! (* indicates complete)

Models
Mobile Phone *
Walther P99 *
Omega Watch *
Glass table with safe *
Human arm (first person view)
Human hand (first person view)
Door Padlock
Man walking turn to face and shoot
Camera "shutter" effect for iconic Bond intro

Locations
Outside of a building with door and padlock
Inside of building containing a room with table in corner

Thursday 3 March 2011

Final Thing Before Marking

When loading up some of my models in 3DS max, it may come up with an error saying a certain file is missing or something... I can assure it isn't, I just don't know how to tell 3DS that!

Storyboard

I did this storyboard quite a few weeks ago but haven't had access to a scanner to put it up here! Finally I've managed to do it, so here it is:


It's pretty basic but it at least it gave me an idea of what to work towards when creating my models

Tuesday 1 March 2011

Model 3 - Laser Watch

For my third model I am going to make James Bond's classic Omega laser watch. Again the first thing to do was find a reference picture.

Firstly, I created the general watch shape using a box and editing the poly. Watches are quite a strange shape when you look at them closely, so it took a while before I was happy. Finally I put a very thin cylinder in place as a reference where the watch face was going to go.


Next I created the outline of the watch face in photoshop. I felt this was the best place to do it as I can just import the picture onto a plane. The numbers on the face do not need to be 3 dimensional, so a picture is fine. The outline of the watch face is a Torus shape. Small cylinders have been used for the buttons on the side. The watch hands were made separately and their vertices edited to shape them like the reference picture.


The picture of the watch face would only import onto a square plane, this meant I had to squash in the corner vertices to make it appear as circle shaped. This was not a problem but I'm sure there is an easier way of doing it!


The watch strap is the most difficult bit of this model, I have not yet found a solution. I tried using the bend modifier but the box will not bend in the desired way.


Another way I have tried doing it is by using the PathDeform modifier. This is similar to Lofting. The shape should be adjusted to be shaped like another spline next to it. No luck yet, need to keep practising!

Here is the watch thus far.


After fiddling around I have managed to solve all the problems! I have changed the watch face to resemble a picture of the actual watch face. I cut out the face from a picture of the watch and imported it onto the cylinder using the material editor.


I have made the hands for the watch face. This was done by using two boxes and a cylinder. The boxes were changed into each hand shape using the edit poly function, beval was used to make the ends more pointy. I then used extrude to draw out the end of each hand to attach it to the small cylinder that the hands connect to.


Next up I slid a piece of glass (cylinder with glass material) infront of the watch face giving it a more authentic look when rendered. Afterwards I used a series of small boxes and cylinders to create the decoration on the outer rim of the watch face. I Also I used bevel on a squashed cylinder to replace the rounded torus shape used previously. This really makes the front of the watch look good!


Next I needed to tackle the watch strap. I opted to use a solution of using boxes and manually twisting them where i wanted them. To do this I created five boxes in a row simulating that seen in the picture. I then used the chamfer tool to round off the edges of each individual part of the strap. Finally, grouping them together, copying them and putting them into place the watch is done!


Finally, I added a white background and a spot light to reflect off the glass and my watch was finally complete! Really pleased with it :)